OSCampus - the New Joomla LMS

OSCampus is the new Learning Management System (LMS) for Joomla. It is very robust and widely used at OSTraining, where it’s already used by 1,000's of people every week.
OSCampus is organized in a very simple way: Classes contain Lessons. Everything is a secondary feature which can be configured or can also be omitted.
Secondary features of the Classes are: Teacher, Class image, Pathways (similar to the Joomla categories), Tags (similar to the core Joomla tags), Length (overall length of the whole class) and Difficulty (currently Beginner, Intermediate and Advanced)
This article will guide you through the OSCampus installation and features.
Installation
As mentioned earlier, OSCampus has been in use on the OSTraining website for couple of years now. It was developed specifically for the purpose of providing training to the OSTraining members.
Since it worked so well, OSTraining’s team decided to release it as a standalone extension which everyone can use.
You can purchase and download OSCampus from here.
When you download an installation package, use Joomla Extension manager -> Install feature to install it as any other Joomla extension.
If you want to test the videos or media embeds in lessons, download and install one of these extensions:
When you install all the related extensions (if needed of course), you can proceed with the initial configuration and setup.
Step #1: Create a new Class
As mentioned before, in OSCampus, the main thing is a Class and a Class contains Lessons. Because of that, the very first step is to create a new Class.
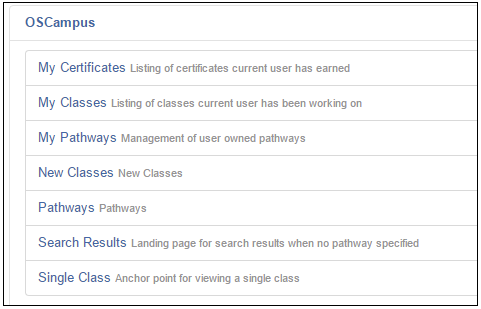
Go to Components > OSCampus and you'll find the main screen.
Let's start by creating our first class:
Make sure "Classes" is selected in the left menu.
Click "New".
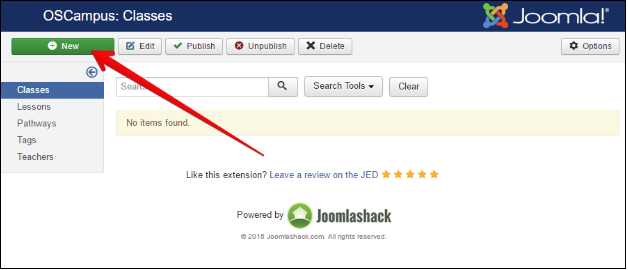
You can now set up your class. The main settings will be on the first page:
- Title: title of the Class
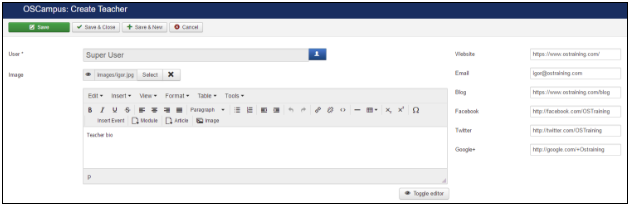
- Teacher: you can add these via the main OSCampus page in the image above
- Image: you can upload a main class image here
- Pathways: these work in a very similar way to core Joomla categories
- Tags: these work in a very similar way to core Joomla tags
- Length: you can tell people how long the class will take to complete
- Difficulty: Currently set to Beginner, Intermediate, Advanced
- Release: The publication date of the class
- Description: Click the tab and enter a class description
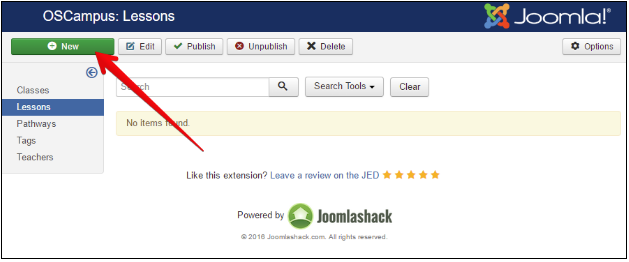
Step #2: Create Lessons
Once we have Class created we can start creating and adding new Lessons to that Class.
- Click "Lessons" in the left menu.
- Click "New".
On the new Lesson page, you have to enter the following minimum details:
- Title: The name of this lesson
- Class: Choose the class you created earlier
- Module: Use this to divide up the lessons into shorter modules.
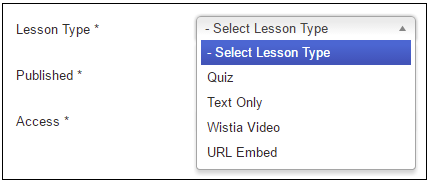
- Lesson Type: This will depend on the video extensions you have installed. If you have OSEmbed, choose "URL Embed".

There are four different Lesson types.
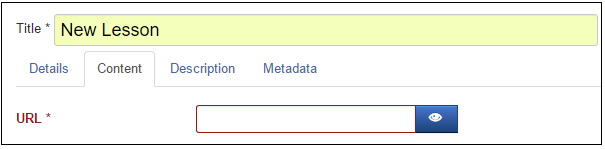
If you choose "URL Embed", and click "Save", you'll then be asked to enter a Video URL under the "Content" tab.
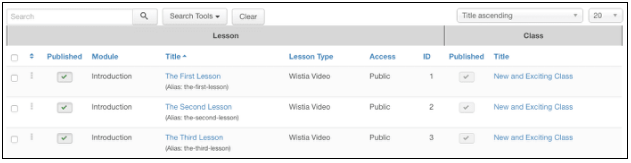
If you create several lessons, you'll see them organized on the "Lessons" page, as in the image below:
Step #3: Create Pathway, Tags and Teachers
Classes and Lessons are the minimum that needs to be defined for OSCampus to work properly. When you define those two item types, you will be able to provide LMS features to your visitors.
You can, however, spice up the frontend presentation of the Classes and Lessons by providing and connecting Pathways, Tags and Teachers with the Classes and Lessons.
Pathways
Pathways are similar to the core Joomla categories feature. There are few things that needs to be defined like:
- Title: title of the pathway
- Image: you can upload a main pathway image here
- Owner: pathway can be owned by the user and in that case, it is considered as a private pathway
- Description: pathway description

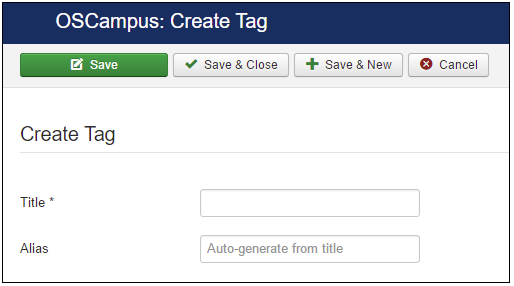
Tags
Tags are similar to the core Joomla tags feature. You need to define only that title of the tag. Alias is auto generated from the title
Teacher
You can define a teacher that will be connected to the Class. There are few things that need to be defined
- User: select user define in Joomla
- Image: here you can upload or choose an image that will represent the teacher on the frontend of the website, in the Class
- Website: teacher’s website URL
- Email: teacher’s email address
- Blog: teacher’s blog URL
- Facebook: teacher’s Facebook URL
- Twitter: teacher’s Twitter URL
- Google+: teacher’s Google+ URL
Step #4: Create menu link
If you want to see the class in the action on the frontend of the website, you have to create a menu item to the New Classes view
- Go to Menus > Main Menu > New.
- Choose OSCampus > New Classes.
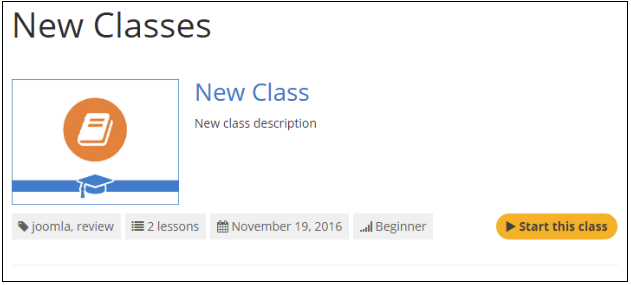
When you visit New Classes menu item on the frontend, you will see the list of Classes created in the OSCampus backend
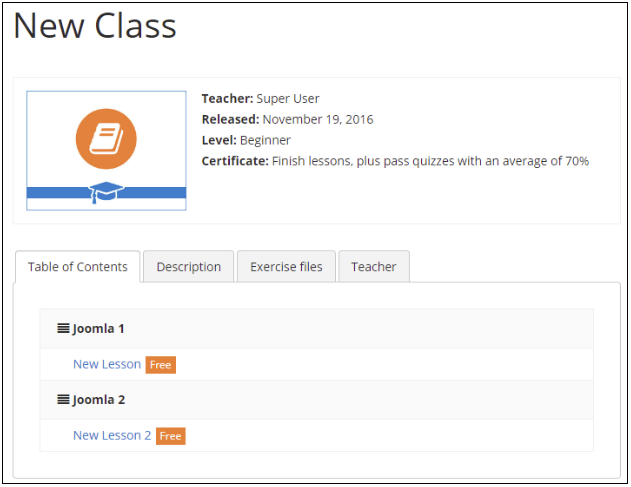
This image below shows the full class overview
Finishing words
This quick review is really just scratching the surface of what OSCampus can do. With the integration of OSEmbed, possibilities are endless. You can use YouTube or Vimeo videos, Slideshare presentations, Google Docs, and much, much more.
Give OSCampus a test and let us know what you think!